The key learning objective of this activity is to develop a basic understanding of how IP addresses are setup for a single network. In the following activities we will extend this to multiple networks and the Internet. To complete the activity you will need to understand the ping command. It is one of the key tools when setting up networks. We have a Ping Activity that provides a introduction to the commend.
Background
IP addresses are 32 bit numbers that identify a network interface on a computer system. They written as 4 byte blocks separated by dot, e.g. 139.86.7.80. Public ip addresses are unique and are only allocated once worldwide. All devices that are connected to the Internet will have an IP address, either IP Version 4 or IP Version 6. In this activity we will cover IPv4.
In this activity you have access to a CentOS Linux system. It is connected to four other nodes on the same network. The systems are named Alpha1 to Alpha4 and Alpha Gateway1. The network topology is depicted below.
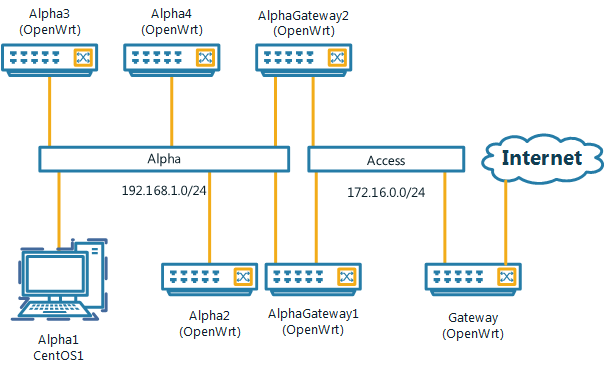
IP addresses for nodes are configured as shown below.
| Name | OS | Network | IP |
| Alpha1 | CentOS | Alpha (eth0) | 192.168.1.151/24 |
| Alpha2 | OpenWrt | Alpha (eth0) | 192.168.1.155/24 |
| Alpha3 | OpenWrt | Alpha (eth0) | 192.168.2.34/22 |
| AlphaGateway1 | OpenWrt | Alpha (eth0)
Access (eth1) |
192.168.1.1/24
172.16.0.145/24 |
You are required to configure node A1.
To communicate between two systems on the Internet, an IP packet needs to be forwarded from one system to another. This will involve a process of routing and forwarding of packets.
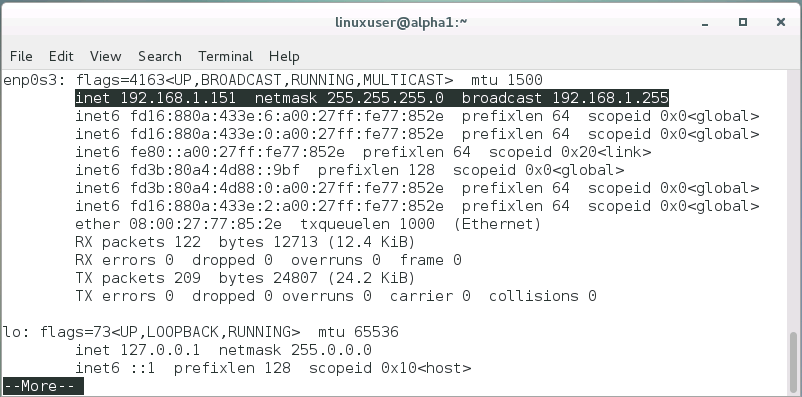
In the simplest case, one program communicates with another program on the same computer. This is done via the loopback interface. This is a virtual interface and it is located at IP address 127.0.0.1. To show the show the local network interface you can use the ifconfig command.
The command will show a number of interfaces:
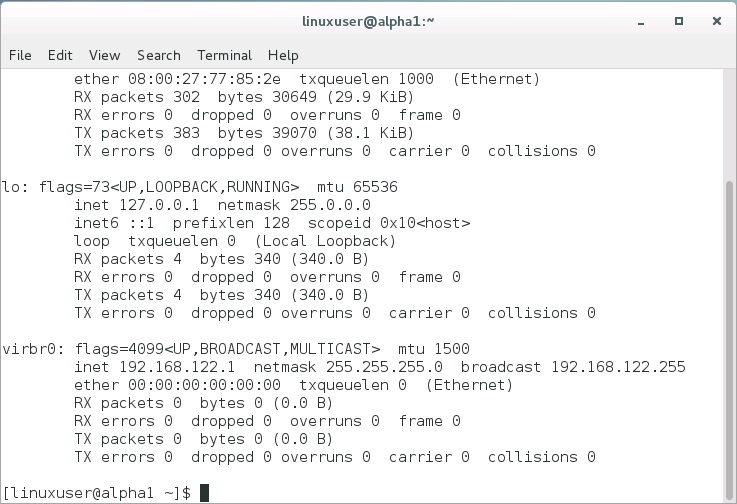
At this point we are interested in the loopback interface lo. It shows an internet address (inet) of 127.0.0.1 and a network mask of 255.0.0.0. We will discuss network masks in a moment. For now you can see whether you can ping the local interface.
If an IP address is located on another system, there are generally two options. Both systems are connected to the same of different networks. Systems that are located on the same network are reachable on the link layer, e.g. they are on the same Ethernet network. This means that the local networking stack can send packets directly to the destination node.
An IP address by itself does not specify a network. That is where the network mask comes into play. It divides the 32 bit IP address into a network and a host portion by specify the mask bits. This become more obvious if network masks are written in binary format. A network mask of 255.0.0.0 becomes 1111 1111 . 0000 0000. 0000 0000 . 0000 0000. (We have added spaces to make it more readable). Doing a logical bitwise AND of an IP address and this network mask will yield the first byte of the address with all other bits zero. This is the network address. Two IP addresses are on the same network if the have the same network address.
An alternative notation that is widely used identified the number of bits that makeup the network address, e.g. 127.0.0.1/8. Both mean the same.
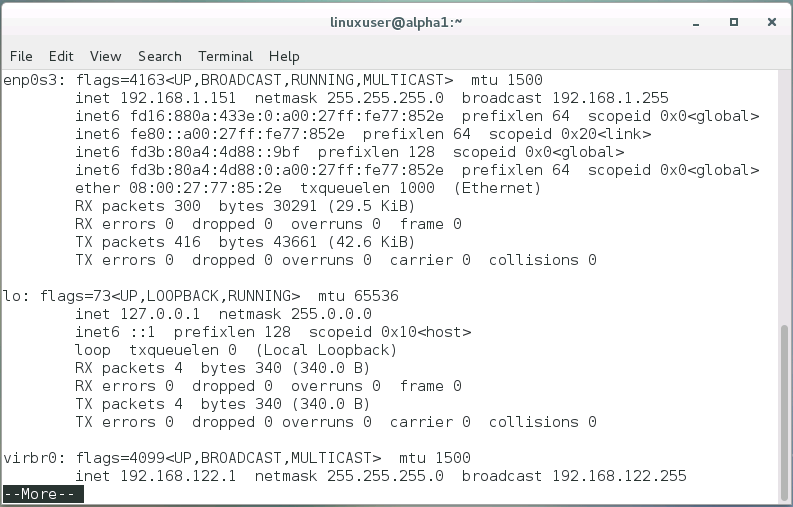
After booting up, A1 has no IP address preconfigured and there is no DHCP server active on the network. Doing ifconfig, the information about the first interface, scrolled off the screen. You can either press shift and the page-up keys to scroll up, alternatively you can use the more command.
To change to the next screen, simply press the spacebar. You can now see the information for the first interface:
Ways how to set IP addresses differ between distributions. Here we will use the GUI utility.
You will get a popup window like this:
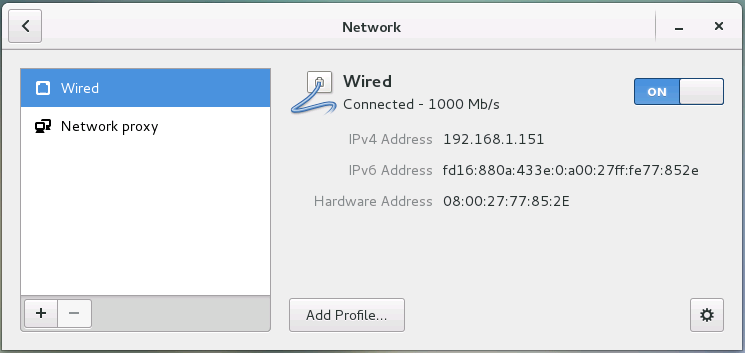
Now you can enter the IP address and network mask for host Alpha1. The notation ip address/24 implies a network mask of 255.255.255.0 See the table above for details and leave the Gateway field blank. Click Apply to save the changes. To activate the changes, you have to turn the Wired adapter off and on again. Close the window.
Now you can reach the other host on this subnet.
You are not able to reach Alpha 3. Our current network address is 192.168.1.0. The network address of Alpha 3 is 192.168.2.0 using our network mask of 255.255.255.0. You might have noticed that Alpha has a different number of bit allocated to the network address: /22. This means the network mask is 255.255.252.0. In binary notation the third byte is 11111100. If we use this mask with Alpha 3, the network address is 192.168.0.0. If we do it with Alpha1, we get the same network address. Changing the subnet mask of our host Alpha1 to 255.255.252.0 should allow us to ping host Alpha3. Let’s try it.
Did it work? If not did you turn the network off and on?
Configuring an IP address and network mask on a local interface allows you to reach hosts on you subnet. How do you reach hosts that are not directly connected to you? That’s where the default gateway parameter comes in. The default gateway is where a system sends packets if it can’t deliver them on the local network. In our case that is Alpha Gateway1. Go back into the IPv4 configuration and add the IP for the gateway: 192.168.1.1. Now you are able to reach the gateway of the next upstream node 172.16.0.1. Make sure that it is working using ping and don’t forget to restart the network interface after you made the changes.
This has been a very basic introduction. Why not try the activity with two computers at home? All you need is two computers that are connected to a common network, either wirelessly or wired.
 Alexander A Kist